
Fixing Layer Adhesion in Large 3D Prints: A Step-by-Step Guide
Table of Contents
- Diagnosing Layer Adhesion Versus Bed Adhesion
- Why Large Prints Lose Layer Adhesion
- Adjusting Nozzle and Print Temperature for Layer Adhesion
- Fixing Layer Adhesion Issues in PLA Prints
- Fixing Layer Adhesion Issues in PETG Prints
- Tuning Speed, Cooling, Flow and Print Orientation
- Keeping Large Prints Attached to the Bed and Testing Your Fix
- Frequently Asked Questions
Diagnosing Layer Adhesion Versus Bed Adhesion
Layer adhesion failure and bed adhesion failure look similar from across the room, but they have different causes and different fixes. Layer adhesion is how well each new layer bonds to the one beneath it.
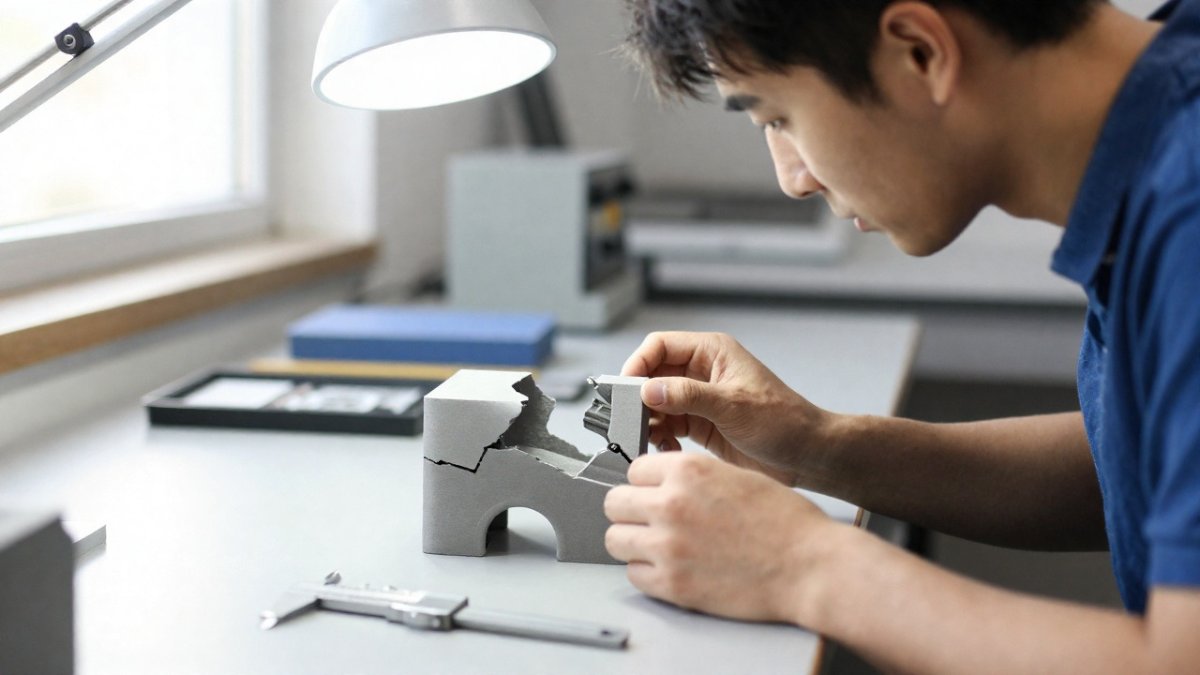
Start with the break itself. If a part splits cleanly between layers, you have a layer adhesion problem.
The Split-Test Method for Separating the Two Failures
Use this quick split test to tell them apart:
- Print a small test cube (20 mm). Keep it on the same bed and filament as the failed part.
- Check the first layer. Look for gaps, lifting, or shiny spots. These point to bed adhesion.
- Snap the cube. If it breaks between layers, the problem is layer adhesion.
- Repeat with a different bed prep. If the first layer improves but the cube still splits, your problem is layer adhesion.
Watch out: a clean first layer does not prove your layers are bonding well, and a large part can still split at the top after the bed is fixed.
Why Large Prints Lose Layer Adhesion
Large prints fail at the layer bond for reasons that rarely show up on a 20 mm cube. The nozzle spends hours tracing long perimeters, the part gains mass and thermal inertia, and the chamber around it is rarely uniform. The result is a bond that is strong at the bottom and weak near the top, or strong on one side and brittle on the other.
- Long print times expose lower layers to cooling for hours before the top is finished.
- Tall parts flex and vibrate as the bed moves or the gantry accelerates, which stresses fresh layers that have not fully crystallized or solidified.
- Large volumes trap heat unevenly. The center of a big part can stay warm while the edges near an open door or a cold wall cool fast, creating a temperature gradient across the same layer.
- Filament path length matters. On a large printer with a long Bowden tube or a heavy direct-drive head, extrusion pressure and retraction behave differently than on a small machine, and inconsistent flow shows up as weak layers.
Thermal Gradients and Ambient Drafts in Large Build Volumes
Heat is a major factor, but not only in the simple "raise the nozzle" sense.
A practical way to see this is to print a tall, thin tower at each corner of the bed and compare how they bond. If the tower nearest the door splits first, you have a draft problem, not a temperature-setting problem.
Try these fixes:
- Close doors and windows near the printer, and block HVAC vents that blow across the build volume.
- Use an enclosure or a simple cardboard shroud. Even a passive enclosure smooths gradients by trapping warm air.
- Keep the room warm if you can, and avoid placing the printer near a cold exterior wall or a garage door.
- Let the printer warm up with the bed and chamber at temperature before starting a long job, so the first layers are not laid down into a cold chamber.
- On open-frame printers, orient the part so its longest dimension is not directly in the path of a known draft.
Watch out: an enclosure that traps too much heat can cause heat creep and jams on PLA, so monitor the hotend and keep the chamber below the filament's glass transition temperature where possible.
Material-Specific Starting Points for Large Prints
Generic temperature advice fails on large parts because the same filament behaves differently when a layer has to bond to a surface that has been cooling for hours. Use these as starting points, then validate on your own printer and filament:
- PLA: nozzle 210-220°C, part-cooling fan 30-50% for structural parts, chamber at ambient or lightly enclosed. PLA bonds well when the next layer lands on a surface that is still warm but not soft.
- PETG: nozzle 240-255°C, fan 20-40%, and slower outer walls. PETG strings easily, so do not chase stringing with fan speed at the cost of layer strength.
- ABS/ASA: nozzle 240-260°C, fan off or below 20%, and an enclosure that holds 95-110°F (35-45°C). These materials rely on chamber heat for both bonding and warp control.
- Large-format PLA on a big printer: consider a 0.6 mm nozzle and a slightly higher flow to put more material and heat into each bond, then validate with a tall test tower.
Running the upper half of the filament's recommended temperature range with a warm chamber can help reduce large-print layer failures. Document what works per material and per printer, because the same spool can need different settings on a 200 mm printer and a 500 mm printer.
Adjusting Nozzle and Print Temperature for Layer Adhesion
Temperature has the biggest effect on layer bonding. If the nozzle is too cold, each layer cools before the next one lands, and the bond is weak.
- Raise the nozzle temperature in 5°C steps.
- Print a tall test tower after each change.
- Stop when the layers fuse without stringing or blobs.
Keep the part-cooling fan low on large prints. Heavy fan speeds cool the layers too fast. Use the fan only enough to avoid overhangs sagging.
Fixing Layer Adhesion Issues in PLA Prints
PLA is the most common material for large prints, and it bonds well when the temperature is right. Most PLA layer problems come from a nozzle that is too cool or fan speed that is too high.
- Start with a nozzle temperature near the top of the filament's recommended range.
- Reduce part-cooling fan speed for structural parts.
- Dry the filament if it has been exposed to humid air. Wet PLA prints with weak layers and stringing.
A common mistake is turning the fan to full speed to get sharp overhangs, then wondering why the part snaps. Trade a little overhang quality for strength on load-bearing parts.
Fixing Layer Adhesion Issues in PETG Prints
PETG bonds more strongly than PLA, but it needs different handling. It likes higher temperatures and tends to string.
- Use a nozzle temperature in the upper part of the filament's range.
- Keep the fan lower than you would for PLA.
- Slow the print speed for the outer walls so each layer has time to fuse.
PETG also picks up moisture quickly. Store it in a sealed container with desiccant, and dry it before a large print if it feels soft or sounds crackly while extruding.
Tuning Speed, Cooling, Flow and Print Orientation
Speed, flow, cooling, and orientation work together with temperature. On a large print, changing only one of them often moves the failure rather than fixing it. The goal is to give each new layer enough heat and enough time to fuse before the next one lands, while keeping the part from warping or sagging.
- Print speed: Slow the outer wall on large parts, and keep the inner walls and infill faster so the job does not run for days. Faster outer walls leave less time for the bond to form and more chance for the nozzle to pull a cooling layer.
- Flow rate: Calibrate extrusion so each line is full but not bulging. Under-extrusion creates gaps between layers, and over-extrusion causes bulges that the nozzle drags through on the next pass. A simple flow test on a single-wall cube is enough to catch gross errors before a long print.
- Cooling: Keep part-cooling low on structural large prints. Use just enough fan to keep overhangs from sagging, and consider turning the fan down or off for the upper layers of a tall part where the bond is most at risk.
- Orientation: Rotate the part so the load runs along the layers rather than across them. Layer lines are the weak point, so do not place them where stress will pull them apart. On a large bracket, that can mean printing it on its side rather than flat.
Geometry, Walls, Infill, and Seams on Large Parts
Large-print strength is not only a slicer temperature problem. Geometry and toolpath choices decide where stress concentrates and how many opportunities the part has to delaminate.
- Wall count: More perimeters spread load across more bonds. For load-bearing large parts, the outer wall should be printed slowly enough to bond.
- Infill: Higher infill density does not automatically mean stronger layer bonds. Gyroid or cubic infill can give better support to the walls than a low-density grid.
- Seam placement: A seam is a built-in weak spot. On large parts, place seams on a non-critical face or use a randomized seam so no single vertical line of seams becomes a crack path.
- Stress concentration: Sharp internal corners and thin necks concentrate stress across layer lines. Add fillets or increase local wall count where the part will see bending or impact.
- Nozzle diameter and line width: A larger nozzle makes thicker lines that carry more heat into the bond on large parts. Pick a line width that suits the part's strength needs, and validate with a tall test tower rather than a small cube.
Watch out: slowing every feature to a crawl can cause heat creep and jams on long prints, so slow the outer walls and critical layers rather than the entire job.
Validating Strength Instead of Relying on Appearance
A part that looks good can still snap between layers. After changing speed, flow, cooling, or orientation, print a tall test tower or a section of the actual part and break it deliberately. Inspect the fracture surface: a strong bond fails through the material with rough, torn edges, while a weak bond fails cleanly between layers with a glossy or smooth surface. Compare the break to your earlier test and keep notes on the settings that produced it.
The article's main settings for tuning layer bonds on large prints are summarised below.
| Setting | Adjustment | Why it matters |
|---|---|---|
| Outer wall speed | Slow it down | Gives the bond time to form |
| Flow rate | Calibrate to full, not bulging | Avoids gaps and bulges |
| Part cooling | Keep low on structural parts | Prevents layers cooling too fast |
| Orientation | Run load along the layers | Layer lines are the weak point |
| Break test | Compare fracture surface | Shows whether the fix worked |
Keeping Large Prints Attached to the Bed and Testing Your Fix
A large part that lifts off the bed will never bond well above the first layer.
Once your changes are in, test them properly. Print a new test cube, snap it, and compare the break surface to your earlier test.
Document your settings for each material and printer. Small notes save hours on the next large job.
If your large parts still fail after these steps, you can upload your file for an instant quote or explore our Our Services range.
Frequently Asked Questions
How can I fix layer adhesion issues in 3D printing?
Start by confirming the failure is between layers rather than between the part and the bed. If layers split apart, raise nozzle temperature in small steps, reduce print speed for outer walls, and adjust part-cooling fan speed for materials like PETG. Recalibrate extrusion flow so layers are fully bonded, then test with a tall calibration print. Change one variable at a time so you can see which adjustment actually helped.
Does increasing bed temperature help layer adhesion?
Bed temperature mainly affects first-layer adhesion to the build plate and warping, not bonding between upper layers. Raising the bed can help a large print stay attached, but it will not fix layers that split apart in the middle of a part. For layer-to-layer bonding, focus on nozzle temperature, cooling, speed and flow. If the print lifts off the bed, bed temperature and surface cleanliness are the variables to check first.
Why are the layers splitting apart on my large 3D print?
Splitting usually means each layer cools below its bonding temperature before the next layer is deposited. Large prints are prone to this because the part is taller and more exposed to ambient drafts, and the lower sections stay cooler over time. Common fixes include raising nozzle temperature, slowing outer wall speed, reducing fan speed, and enclosing the printer or blocking drafts. Check that your filament is dry, since moisture causes weak bonding.
How do I improve layer adhesion with PLA?
PLA usually bonds well at the nozzle temperature recommended by the filament manufacturer. If layers separate, increase temperature in small steps and reduce part-cooling fan speed, since excessive cooling prevents layers from fusing. Dry the filament if it has been exposed to humidity, and keep print speed moderate for large walls. Document your settings so you can repeat the result on future prints.
