
Best Practices for Custom 3D Printed Nameplates
Table of Contents
- Plan Your Nameplate Design and Dimensions
- Best Filament for 3D Printed Nameplates
- 3D Printed Nameplate Font Size and Readability
- 3D Printing Nameplate Settings for Quality Results
- 3D Printed Nameplate Mounting Options
- Common Mistakes to Avoid
- Troubleshooting Print Quality and Finishing
- Frequently Asked Questions
Last Updated: October 19, 2026
Plan Your Nameplate Design and Dimensions
Designing custom 3D printed nameplates starts with clear decisions about shape, size, and attachment. Getting these right prevents costly reprints.
Choosing a Base Shape and Size
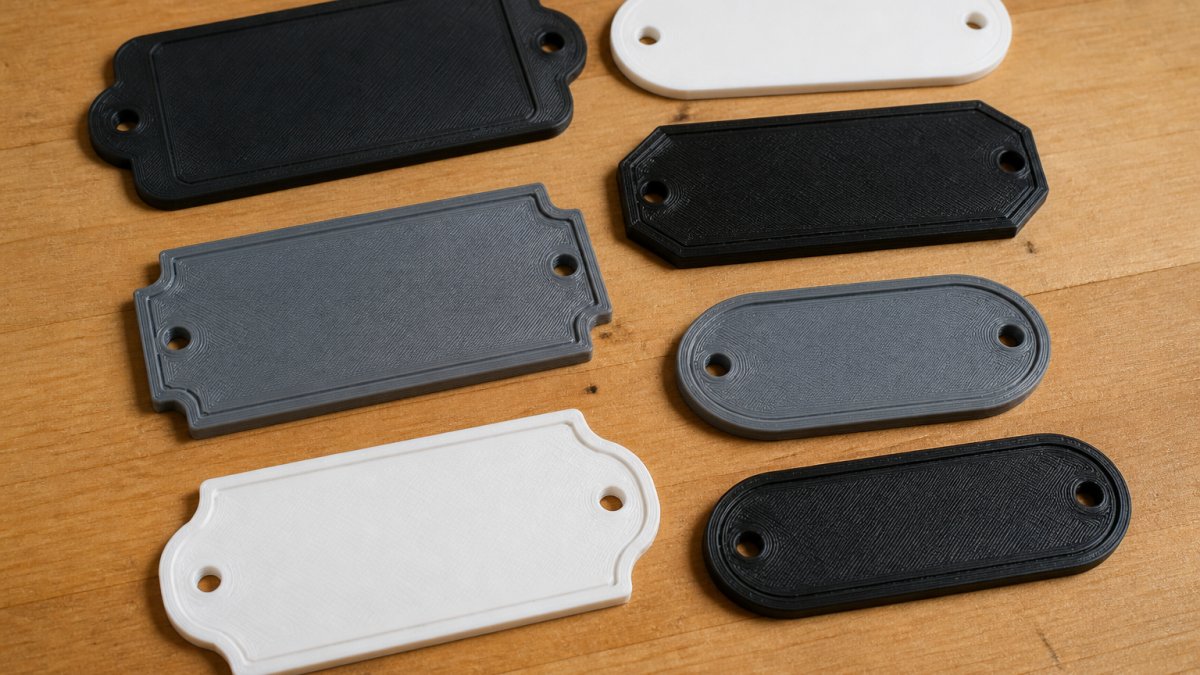
A rectangle works for most applications; rounded corners add a modern feel; custom shapes (hexagons, ovals, branded outlines) demand more design time but stand out at trade shows.
Size matters: too small is hard to read, too large wastes material. Desk nameplates should be 2 to 4 inches wide; trade show badges or wall signs, 4 to 8 inches.
Thickness affects durability and cost. A 0.25-inch nameplate feels substantial; anything under 0.125 inches risks breaking during handling.
Plan mounting before finalizing dimensions, adhesive backing, screw holes, or a magnetic base each change your design requirements.
Selecting Your Design Tool and CAD Approach
One insider tip: check your design in the slicer before printing. This catches spelling mistakes, geometry problems, and layer preview issues that won't show up in your CAD file.
Best Filament for 3D Printed Nameplates
Material choice determines how your nameplate looks, feels, and lasts. Match the filament to where it will live, office desk, sunlit window, covered exterior, or handled trade show piece, to prevent fading, warping, cracking, and surface wear.
Matching Material to Indoor and Outdoor Conditions
PLA is the default for indoor nameplates. It prints cleanly at 200-210°C, holds fine text detail, and comes in many colors.
PETG handles impact, temperature swings, and moisture better than PLA and tolerates more heat. It prints at 230-250°C and strings more, so tune retraction.
ASA is for sunlight or weather exposure, with better UV resistance and heat tolerance than PLA or standard PETG. It prints at high temperatures, gives off fumes, and benefits from an enclosure.
Nylon is the toughness option: it flexes without breaking and resists abrasion and chemicals.
Polycarbonate is the high end for impact and heat resistance, stiff, strong, and heat-tolerant, but the most finicky and expensive common option. Reserve it for industrial or high-heat environments.
UV, Heat, Moisture, and Abrasion Considerations
Four environmental factors drive most material failures:
- UV exposure. Sunlight causes fading, chalking, and embrittlement. PLA and standard PETG degrade faster in direct sun; ASA resists it. Treat UV resistance as a primary requirement for window-facing or outdoor plates.
- Heat. Plates near windows, radiators, ovens, or vehicle interiors exceed room temperature. PLA is most vulnerable; ASA, polycarbonate, and nylon tolerate more. Consider the hottest day, not the average.
- Moisture and humidity. Bathrooms, kitchens, covered patios, and humid climates stress nameplates. PETG, ASA, and nylon handle humidity better than PLA. For damp placement, design drainage or avoid water-trapping pockets.
- Abrasion and handling. Badges, equipment tags, and door plates get touched and wiped. Nylon and polycarbonate resist abrasion best; PLA scuffs sooner. A clear coat or matte finish extends softer materials.
Color, Finish, and Multi-Color Printing
Multi-color printing puts text in one color and the base in another without post-print painting, faster and more consistent than masking, with color inside the part so handling doesn't wear the lettering.
A Practical Material Selection Checklist
Before committing to a filament, answer:
- Where will it live? Indoors, covered outdoors, or fully exposed?
- What is the hottest temperature it will see? Consider windows, vehicles, and equipment.
- Will it get wet? Humidity, splashes, or rain?
- How much handling? Display-only, or touched and moved regularly?
- How long must it last? A one-week trade show differs from a permanent door plate.
- What is the budget and print capability? Nylon and polycarbonate demand drying, enclosures, and tuning that PLA and PETG do not.
These six questions usually narrow the choice to one or two materials and prevent the most expensive mistake: a beautiful nameplate in a material that fails in its actual environment.
3D Printed Nameplate Font Size and Readability
Text that's too small is unreadable; too large wastes space and looks clumsy. The sweet spot depends on distance and viewing angle.
Text Depth and Raised or Recessed Lettering
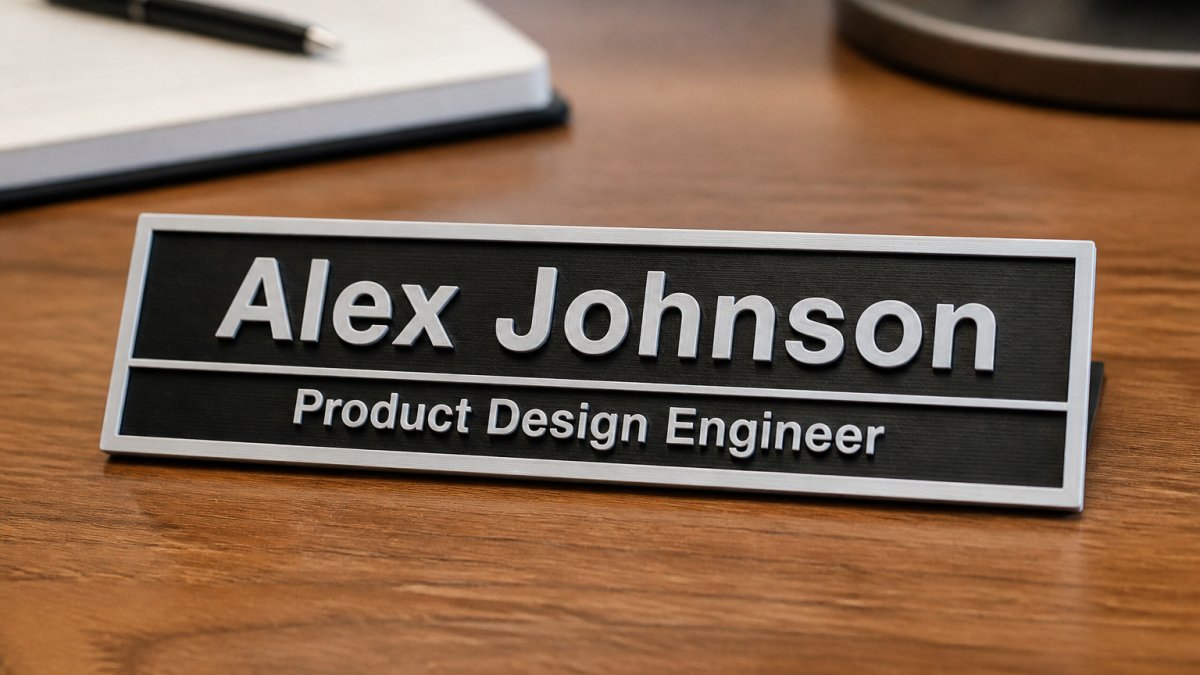
Raised text (embossed) creates shadow and depth that catches light. Raised letters should be at least 0.1 inches tall; smaller becomes hard to read from a distance.
Recessed text (engraved) sinks into the base and looks clean and professional. It needs more depth than raised text, aim for 0.15 inches minimum.
Depth affects print time and material use, deeply recessed letters take longer than shallow raised text. Plan depth around readability and time constraints.
Contrast Between Text and Background
High contrast makes text readable. Black on white is easiest; light on dark works too but needs more careful font selection.
Avoid low-contrast combinations like gray on light gray or blue on black. If brand colors lack natural contrast, adjust one color or add a thin border around the text.
Font choice matters as much as color. Sans-serif fonts (Arial, Helvetica) read faster than serif; keep letter spacing consistent and avoid overly decorative fonts for main text.
3D Printing Nameplate Settings for Quality Results
Print settings control surface finish, strength, and accuracy; wrong settings produce warped parts, poor text clarity, or failed prints. The settings below are starting points for a typical FDM printer with a 0.4mm nozzle, a baseline to tune, not a universal recipe. A small test print of the actual text and base geometry saves far more time than guessing on the final piece.
Upload your STL file for an instant quote →
Tested Starting Settings for Nameplates
These starting points assume a 0.4mm nozzle and a modern FDM printer. Adjust from here based on your machine and material.
| Setting | Starting point | Why it matters for nameplates |
|---|---|---|
| Layer height | 0.12-0.16mm | Balances sharp text edges against print time; thinner layers sharpen small letters |
| First layer height | 0.2mm | Improves bed adhesion on a flat base |
| Nozzle temperature | PLA 200-210°C; PETG 230-250°C; ASA 240-260°C | Match the filament; too cool causes poor layer bonding, too hot causes stringing |
| Bed temperature | PLA 55-60°C; PETG 70-80°C; ASA 90-110°C | Reduces warping on flat plates |
| Wall count | 3-4 perimeters | Gives text and edges strength without relying on infill |
| Infill density | 15-25% for display; 30-40% for handled pieces | Enough strength without wasting material |
| Infill pattern | Gyroid or cubic | Good strength-to-material ratio and even support for top surfaces |
| Print speed | 40-60mm/s outer walls; 80-120mm/s infill | Slower outer walls improve text definition |
| First layer speed | 20-25mm/s | Better adhesion and a cleaner base |
| Retraction | Tune per printer; start around 0.8-1.5mm at 30-45mm/s for direct drive | Reduces stringing between letters |
| Cooling | PLA high; PETG moderate; ASA low | PLA needs cooling for detail; ASA needs less to avoid warping |
| Orientation | Flat on the bed, text facing up | Smoothest top surface and sharpest letter tops |
Layer Height, Nozzle, and Text Definition
Lay the nameplate flat, parallel to the bed, with text facing up, the standard approach, giving the smoothest top surface and sharpest letter tops. Vertical text saves bed space but creates layer lines across letters and weakens them.
Infill, Walls, and Strength
Wall count matters more than infill for small parts. Three to four perimeters give the base and text edges real strength, especially on thin features like the stem of an "I" or the crossbar of an "H." If a letter keeps breaking, increase wall count before infill.
Adjusting Settings for Different Printers
The starting table is a baseline, not a universal recipe. Adjust in this order:
- Bed adhesion first. If the first layer lifts or the base warps, clean the bed, raise first-layer temperature slightly, slow the first layer, and add a brim if needed.
- Then text definition. If letters look rough or blurry, lower layer height, slow the outer wall speed, and check nozzle temperature against the filament's range.
- Then stringing. Tune retraction distance and speed for your extruder type, direct-drive and Bowden setups need different values.
- Then dimensional accuracy. Check belt tension, flow rate, and horizontal expansion settings in the slicer.
Enclosed printers handle ASA and other high-temperature materials more reliably; open-frame printers may need a draft shield or warmer room. Direct-drive extruders usually need less retraction than Bowden setups. A textured bed may need a slightly higher first-layer height or different bed temperature than a smooth plate. When you change printers, re-run the small test coupon rather than assuming the old profile transfers.
Bed Adhesion and Pre-Print Verification
Check your model in the slicer before printing:
- Correct text spelling and orientation
- Proper layer preview (text should show clean layers)
- No floating geometry or unsupported features
- Adequate wall thickness (at least 1.5mm for text features)
- First layer preview showing a continuous, well-supported base
A quick slicer check catches most print failures before they waste material and time, the cheapest quality control you can do.
3D Printed Nameplate Mounting Options
How you attach the nameplate matters as much as how you make it. Poor mounting ruins a professional-looking piece.
Integrated Mounting Holes and Hardware Selection
Screw holes offer permanent, adjustable mounting. Size holes for your fasteners (typically M3 or M4); countersunk holes hide screw heads. Test-fit hardware before printing the final version.
Adhesive backing works for smooth surfaces, strong double-sided tape or contact cement. It's fastest but permanent; make sure the surface is clean and dry first.
Magnetic bases work for metal surfaces. Embed small neodymium magnets during printing by pausing mid-layer to insert them, more complex, but allows easy repositioning.
Surface Preparation and Installation
Mount on a clean, dry surface, dust or moisture under the base causes adhesive failure. If using screws, pre-drill holes in the mounting surface to prevent cracking.
Common Mistakes to Avoid
Most nameplate failures come from a few predictable mistakes.
Text too small. Text that looks fine on screen becomes illegible in person. Always test readability with a small sample print first.
Insufficient wall thickness. Text features thinner than 1.5mm break easily during removal or handling. Thicken fragile letters like "I" or "l."
Poor contrast. Similar text and background colors make nameplates hard to read. Choose colors with clear visual separation.
Ignoring print orientation. Vertical text saves bed space but creates visible layer lines across letters. Lay nameplates flat for the best finish.
Skipping slicer preview. Going straight from CAD to printing skips catching geometry errors, text orientation problems, and unsupported features that cause print failures.
Wrong infill settings. 100 percent infill wastes material and time; below 15 percent creates weak pieces that crack under stress.
Troubleshooting Print Quality and Finishing
Creating a professional 3D printed nameplate requires attention to design, material choice, print settings, and finishing, the steps here address readability, durability, and appearance. When you're ready to move from design to production, upload your STL file to Alex 3D Print Us LLC for an instant quote. We handle the engineering, print settings, and finishing so your nameplate arrives ready to install. Our Bambu Lab multi-color printing and xTool laser engraving ensure your brand looks sharp in your customers' hands.
Frequently Asked Questions
What material is best for 3D printed nameplates?
Material choice for 3D printed nameplates depends on the intended use and environment. Consider factors like durability, appearance, and exposure to elements when making your selection.
What font size and thickness make text readable on a 3D printed nameplate?
For optimal readability on a 3D printed nameplate, ensure sufficient text height and depth to create clear contrast. Sans-serif fonts generally print more clearly.
How do I prepare my 3D model file for printing?
Export your nameplate design as an STL file from your CAD tool. Ensure the model has manifold geometry (no gaps or overlapping surfaces) and that all text and details are clearly defined.
What print settings produce the best nameplate quality?
Achieving high-quality nameplates involves precise print settings, including appropriate layer height for detail, optimal infill for strength, and correct orientation to minimize support material. Proper bed adhesion and print speed are also crucial for a clean finish.