
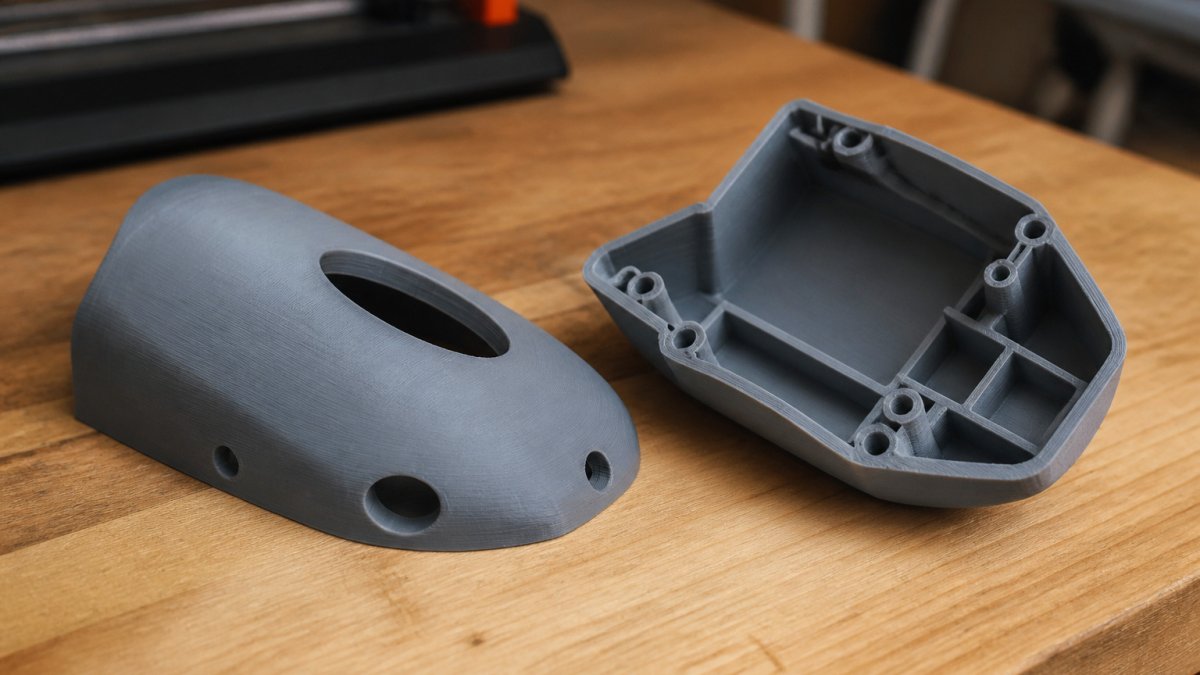
How Do You Hollow Out a 3D Model for Printing?
Quick Summary
To hollow out 3D models for printing, remove the solid interior with a hollow tool in your slicer, such as PrusaSlicer or Bambu Studio, then set a wall thickness that is a multiple of your nozzle diameter. Watertight geometry, correct wall settings, and drain holes on resin prints keep the shell from failing.
- Hollowed shells use far less filament or resin than solid parts.
- Walls should be a multiple of your nozzle diameter, such as 1.2 mm on a 0.4 mm nozzle.
- Place drain holes on the lowest point, typically 2 to 4 mm wide.
- Resin prints need at least one drain hole, and large cavities need two.
- Run mesh repair and confirm the model is watertight before hollowing.
Table of Contents
- Why Hollow Out a 3D Model Before Printing
- Hollow vs. Infill 3D Printing: Which Saves More Material
- How to Hollow an STL File in Your Slicer
- Setting the Right 3D Print Wall Thickness
- Adding 3D Print Drain Holes So Resin and Powder Can Escape
- Avoiding Mesh Errors When You Hollow a Model
- Send Your Hollowed Model for a Quote from Alex 3D Print Us LLC
- Frequently Asked Questions
Why Hollow Out a 3D Model Before Printing
Last Updated: October 29, 2026
Hollowing out a model is one of the fastest ways to cut print time and filament costs.
A hollow model is a shell with an inner cavity, and the wall thickness decides how strong it is. Most solid parts waste material in places that never bear load.
Here is the core trade-off:
- Less material: Hollow parts use far less filament or resin.
- Shorter print time: Less volume means fewer layers to lay down.
- Lower handling weight: Shells are light enough for hand use and shipping.
Hollowing is not always the right move. Parts that carry heavy loads or need solid cross-sections should stay solid.
Hollow vs. Infill 3D Printing: Which Saves More Material
Hollowing and infill both reduce material, but they work differently. Infill is a percentage setting inside the slicer that controls how much of the interior is filled with a lattice pattern.
A common mistake is assuming that 10% infill and a hollow shell use the same amount of material. They do not.
Use this quick comparison to choose:
| Method | Where the material savings come from | Best for | Watch out for |
|---|---|---|---|
| Infill only | Lattice inside the part | Functional parts with moderate strength needs | Still uses full outer geometry |
| Hollowing | Solid interior removed from the file | Large, lightweight shells and display pieces | Thin walls can collapse or crack |
| Hollowing plus infill | Shell plus light internal support | Large parts that need both savings and stiffness | Needs careful wall and infill settings |
Many teams combine both approaches, using a hollow shell with light internal infill for strong walls and some internal support.
How to Hollow an STL File in Your Slicer
Most slicers can hollow a model directly, but the tool location and behavior differ between programs. Below are workflows for three common slicers, followed by the settings that decide whether the shell survives printing.
Cura
Cura does not have a native hollow tool in the standard interface. The practical workflow is:
- Load the STL and confirm it is watertight (Cura may flag non-manifold models with a repair prompt).
- Use the Per Model Settings panel to set Infill Density to 0% and Wall Line Count to the number of perimeters you want. This produces a shell-only print without editing the mesh.
- For a true hollowed mesh (cavity in the file), use the Mesh Tools plugin or hollow in Meshmixer first, then re-import.
- Set Top/Bottom Layers to match your wall count so the shell closes properly.
PrusaSlicer
PrusaSlicer offers a direct Hollow option:
- Right-click the model and choose Hollow.
- Set Thickness (start at 2 mm) and Quality (higher quality = finer cavity mesh, slower processing).
- Enable Create drain holes and place them on the lowest point of the model.
- Preview the result in the slice view, check that the cavity is continuous and the walls are uniform.
Bambu Studio
Bambu Studio follows the PrusaSlicer lineage:
- Right-click the model and select Hollow.
- Set wall thickness and enable drain holes.
- Use the Variable Layer Height preview to inspect the cavity on curved surfaces.
- Slice and scrub the layer preview for missing walls or trapped voids.
The Settings That Decide Whether the Shell Survives
Wall thickness math: Walls should be a multiple of your nozzle diameter. With a standard 0.4 mm nozzle, use 1.2 mm (3 perimeters), 1.6 mm (4 perimeters), or 2.0 mm (5 perimeters).
Top and bottom layers: These add thickness on top of the wall setting.
Drain holes: For FDM, a trapped cavity is usually harmless, but for resin and powder printing it is not. Place drain holes on the lowest point so gravity helps material escape.
Preview Before You Print
Slice the hollowed model and scrub through the layer preview. A correct hollow shows:
- Continuous perimeters on every layer.
- A clear cavity with no stray internal walls.
- No missing layers or sudden voids.
If the preview shows internal walls or a collapsed cavity, the hollow operation failed, return to the mesh repair section before printing.
Keep your original file. Save the hollowed version under a new name so you can always return to the solid model.
Setting the Right 3D Print Wall Thickness
Wall thickness is the setting that most often decides whether a hollow print survives. Thin walls are light but fragile.
For most functional parts, a wall thickness between 1.5 mm and 3 mm works well. Thicker walls suit parts that take impact or hold weight.
Upload your STL file for an instant quote →
Keep these points in mind:
- Match wall thickness to your nozzle. Walls should be a multiple of your nozzle diameter. A 0.4 mm nozzle works well with walls of 1.2 mm, 1.6 mm or 2.0 mm.
- Account for top and bottom layers. The top and bottom solid layers add thickness on top of the wall setting.
- Test with a small piece first. Print a corner or a short section to check strength before committing to the full model.
Many slicers also let you set minimum wall thickness and wall line count separately. Use both to control strength precisely.
Adding 3D Print Drain Holes So Resin and Powder Can Escape
A hollow model traps material inside.
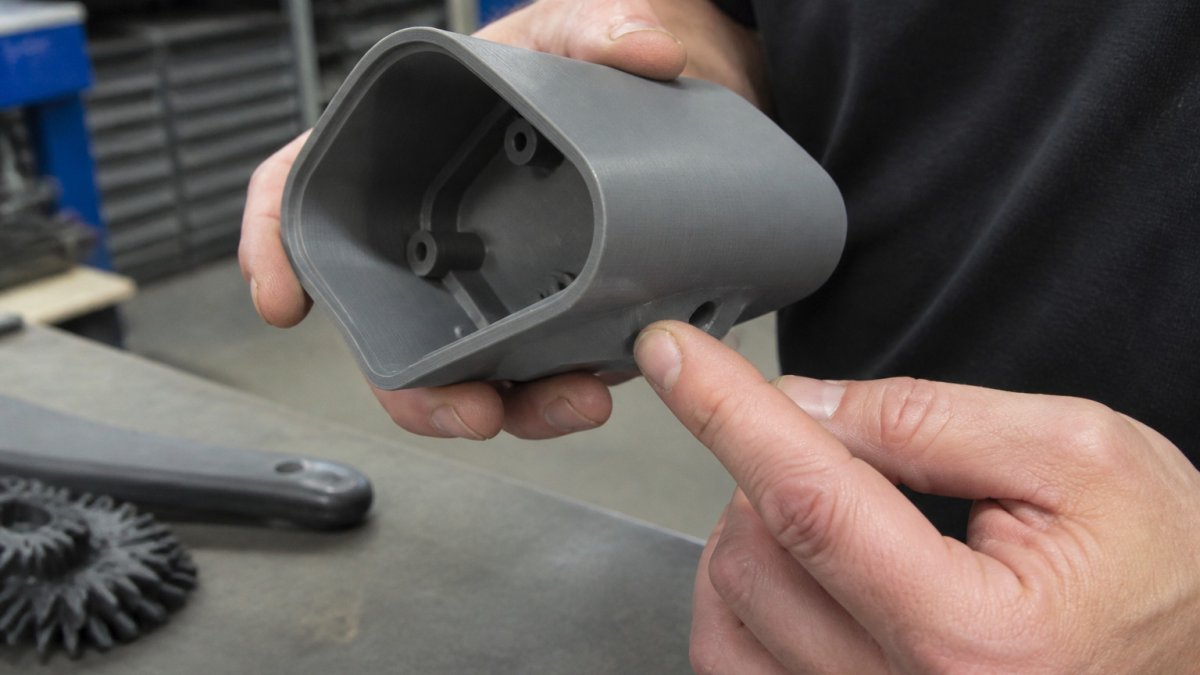
A drain hole gives that material a way out. Place it on the lowest point of the model so gravity helps drain the interior.
For resin printing, drain holes are essential. Without one, the sealed cavity can build pressure during curing and deform the part.
For powder printing, drain holes let unfused powder escape after the print finishes.
Avoiding Mesh Errors When You Hollow a Model
Hollowing depends on clean geometry. Mesh errors that are harmless when viewing a model can break the hollowing process or produce a shell that fails to print. The most common problems are:
- Non-manifold edges: Edges shared by more than two faces confuse the hollowing tool. A single non-manifold edge can cause the shell operation to fail outright or produce an inside-out cavity.
- Holes in the mesh: Open gaps mean the model is not watertight, so the interior cannot be defined. The hollowing tool needs a closed volume to offset inward.
- Flipped normals: Faces pointing the wrong way can invert the shell, so the outside becomes the inside. Slicers may render the model as a solid block or skip entire surfaces.
Automated vs. Manual Mesh Repair: When to Use Each
Most slicers and mesh tools include an automatic repair function. Run it first, it fixes many issues fast. But automatic repair is not a substitute for manual inspection, and knowing when to switch matters.
Use automated repair when:
- The model has simple holes or a few non-manifold edges.
- You are working with a downloaded STL from a marketplace and need a quick watertight result.
- The model is organic or highly detailed and manual editing would be slow.
Switch to manual repair when:
- Automatic repair changes the silhouette or removes fine details.
- The model has self-intersecting geometry that auto-repair cannot resolve without deleting faces.
- You need to preserve specific features (threads, text, thin fins) that auto-repair tends to collapse.
A common pattern is to run auto-repair, then inspect the result in wireframe or x-ray view before hollowing. If the repair introduced new gaps or flattened detail, undo and repair manually.
Software-Specific Mesh Repair Workflows
Meshmixer (free):
- Import the STL and switch to the Analysis view.
- Run Inspector (Analysis > Inspector). It flags holes, non-manifold edges, and self-intersections with colored markers.
- Use the auto-repair option first, then click individual markers to fix remaining defects manually.
- Run Make Solid (Edit > Make Solid) with a fine accuracy setting to rebuild a watertight shell when the mesh is badly damaged.
- Export as STL and re-import into your slicer to confirm the model is watertight before hollowing.
Blender (free):
- Import the STL and enter Edit Mode.
- Select all vertices and run Merge by Distance to weld duplicate vertices that create non-manifold edges.
- Use Select > Select All by Trait > Non-Manifold to highlight problem edges.
- Fill holes with Mesh > Clean Up > Fill Holes or manually bridge edge loops.
- Recalculate normals with Shift+N (Recalculate Outside) to fix flipped faces.
- Apply a Solidify modifier with negative thickness to hollow, then export as STL.
Slicer auto-repair (Cura, PrusaSlicer, Bambu Studio):
- Cura offers a one-click mesh repair via the model settings panel; it works well for simple holes but can miss self-intersections.
- PrusaSlicer and Bambu Studio run automatic repair on import and flag remaining errors in the slice preview. Always check the preview for missing layers or inverted surfaces before printing.
Use this quick check before hollowing:
- Model is watertight with no open edges
- Normals point outward
- No overlapping or self-intersecting parts
Fixing mesh problems early saves time. A file that hollows cleanly prints more reliably, and a manual repair pass on a complex model often takes less time than a failed print. For a deeper guide to diagnosing and fixing common mesh errors, work through the defect types above before you hollow.
Send Your Hollowed Model for a Quote from Alex 3D Print Us LLC
If you want a hollowed model printed without managing the process yourself, upload your STL file for an instant quote. Alex 3D Print Us LLC handles engineering, printing and finishing for prototypes, branded pieces and trade-show items.
Before you upload, confirm the file is watertight, the wall thickness suits your part, and any drain holes are placed on the lowest points. For help with the file format itself, see how to prepare STL files for 3D printing.
Frequently Asked Questions
How do you hollow out a 3D model for printing?
Open the model in your slicer or a mesh tool such as Meshmixer or Blender, then create an inner shell offset inward from the outer surface, typically leaving walls about 1.5 to 3 millimeters thick. Subtract that inner shell from the solid so the part prints as a thin-walled box. Export the result as a watertight STL, check for non-manifold edges, and add at least one drain hole if the part is printed in resin or powder, so trapped liquid or uncured material can escape.
How thick should the walls of a hollow 3D print be?
For most FDM parts, walls between 1.5 and 3 millimeters work well, with the exact figure depending on part size, load and material. Thinner walls save material and print time but can crack under stress or warp. Multiply your nozzle diameter by the number of perimeters your slicer prints to confirm the wall thickness is an even multiple of the extrusion width, which avoids gaps and weak seams.
Do hollow 3D prints need drain holes?
Hollow resin prints almost always need drain holes, because uncured resin trapped inside can leak out later or cause the part to deform. Powder-based and SLS parts also need drain holes so loose powder can be removed. Standard FDM prints generally do not need them, since trapped air is not a problem, though a single vent can help if you later plan to fill the cavity. Place holes at the lowest points of the model and size them around 3 to 5 millimeters.
What is the difference between hollowing a model and using low infill?
Hollowing removes the interior of the model entirely and adds a single shell, so the cavity is empty except for any internal supports you add. Low infill keeps a lattice or pattern of material inside the part to support the walls. Hollow parts use the least material and print fastest, but they are weaker in compression. Infill at 10 to 20 percent gives more strength for functional parts, while hollowing suits display pieces, enclosures and lightweight prototypes.
