
3D Printing Turnaround Time: What to Expect
Table of Contents
- What Is 3D Printing Turnaround Time?
- How Long Does 3D Printing Take?
- Factors Affecting 3D Printing Time
- 3D Printing Post-Processing Time
- How to Reduce 3D Printing Lead Time
- Express Versus Standard Turnaround Options
- Frequently Asked Questions
Last Updated: October 14, 2026
What Is 3D Printing Turnaround Time?
3D printing turnaround time refers to the total elapsed time from when you submit your design file until you receive your finished printed part. This isn't just how long the printer runs.
Understanding turnaround time matters because it affects your project timeline. If you need prototypes for a trade show in two weeks, you need to know whether that's realistic.
The actual print duration is just one piece of the puzzle.
How Long Does 3D Printing Take?
Print duration varies dramatically based on the technology you choose. FDM and SLA are the two most common methods, and they operate very differently.
FDM Printing Timeline
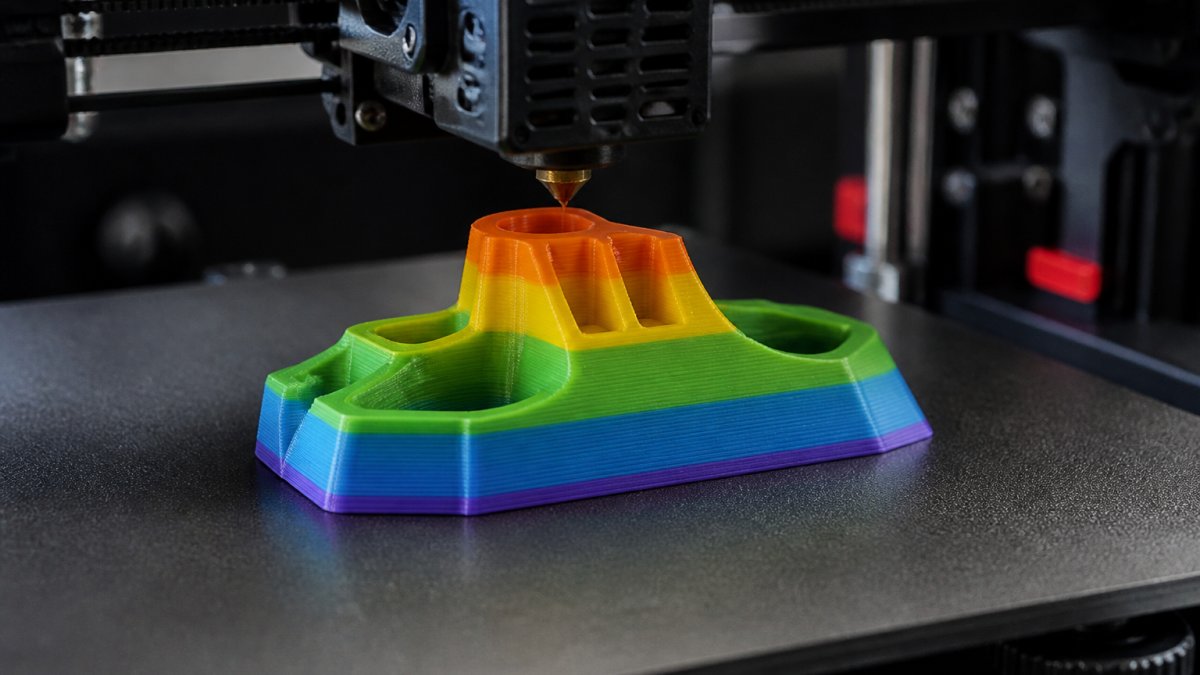
FDM (Fused Deposition Modeling) builds parts layer by layer by extruding melted plastic.
A small part might print in 2-4 hours. Medium parts typically run 8-16 hours. Large parts can take 24-48 hours or longer.
Layer height affects speed directly. Most functional prototypes use 0.2mm for balance between speed and quality.
FDM also requires support structures for overhangs. Those supports add print time and require manual removal afterward.
SLA Printing Timeline
SLA (Stereolithography) uses UV light to cure liquid resin layer by layer.
A small detailed part might print in 1-3 hours. Medium parts usually take 4-8 hours. Larger parts can take 12-24 hours.
SLA produces smoother surfaces and finer details than FDM. The trade-off is that every print requires careful resin handling and post-curing time.
Material selection in SLA affects speed. Standard resins cure quickly.
Factors Affecting 3D Printing Time
Several variables determine how long your specific part takes from start to finish.
Part Size and Geometry
Larger parts take longer. A 1-inch cube prints much faster than a 6-inch cube. Volume matters more than any other single factor.
Complex geometry also extends time. Parts with:
- Intricate internal channels
- Thin walls requiring support
- Organic curves needing fine detail
- Multiple materials or colors
...all demand more print time than simple solid blocks.
Orientation on the build plate affects duration too. Printing a part on its side versus upright changes the number of layers needed. Fewer layers means faster printing. At Alex 3D Print Us LLC, we optimize part orientation to reduce unnecessary print time while maintaining strength and detail.
Layer Height and Print Resolution
Layer height is the vertical thickness of each printed layer. Thinner layers produce better detail but take longer.
Common layer heights:
- 0.4mm: Fast, rougher surface, good for functional parts
- 0.2mm: Standard, balanced quality and speed
- 0.1mm: Slow, high detail, best for precision prototypes
Doubling your layer height can cut print time nearly in half. But you sacrifice surface finish and dimensional accuracy. For trade-show display pieces, 0.4mm works fine. For functional prototypes with tight tolerances, 0.2mm is usually necessary.
Material Selection and Printer Availability
Different materials have different print speeds. Standard PLA and ABS print faster than engineering plastics like Nylon or carbon-fiber composites.
Printer availability also matters. If all your in-house printers are busy, your job waits in queue. That queue time adds days to your turnaround.
Resin type in SLA printing affects curing speed. Standard resins cure faster than rigid engineering resins or flexible materials. Choosing the right material for your use case prevents reprints and delays.
3D Printing Post-Processing Time
Post-processing is where turnaround estimates most often go wrong, because most of it is elapsed time, not machine time. A part can sit in a wash station, a curing chamber, or a drying rack for hours while nobody touches it. If you only count the labor, you will underestimate your deadline.
Here is how the stages break down for a typical order.
Upload your STL file for an instant quote →
Support and Raft Removal
- FDM: 15-45 minutes for a simple part with breakaway supports; 1-3 hours for a part with dense supports or delicate features. Soluble supports (PVA or HIPS) require a dissolution bath, which is 2-12 hours of elapsed time with minimal labor.
- SLA/DLP: 10-30 minutes to remove supports with flush cutters, plus care around thin walls. This is almost entirely labor.
Cleaning and Washing
- SLA/DLP: 5-15 minutes of labor, but the part then needs to drain and dry. Budget 30-60 minutes of elapsed time per batch before curing.
- FDM: Usually none, unless you are removing soluble supports.
Post-Curing
- SLA/DLP: 15-60 minutes in a UV chamber depending on resin and wall thickness. Engineering and high-temp resins often need longer, and some need a heated cure.
- FDM: None for standard PLA or PETG. Annealing for strength is a separate 1-4 hour oven cycle.
Surface Finishing
This is the most variable stage and the one most likely to blow a deadline.
- As-printed, no finish: 0 minutes.
- Support scar sanding: 15-45 minutes per part.
- Sanding to a smooth surface: 1-4 hours of labor, often spread across multiple grits.
- Vapor smoothing (ABS) or epoxy coating: 2-24 hours of elapsed time, mostly drying.
- Primer and paint: 4-48 hours of elapsed time across coats and dry times, with 1-3 hours of actual labor.
Inspection
- Visual check: 5-15 minutes.
- Dimensional check with calipers or gauges: 15-60 minutes depending on the number of critical features.
- Functional or fit test: 30 minutes to several hours if a test fixture or assembly is involved.
Putting It Together
For a single FDM functional prototype with light sanding and a dimensional check, post-processing is roughly 1-3 hours of labor and 2-4 hours of elapsed time. For an SLA display piece that is painted and clear-coated, expect 3-6 hours of labor and 1-3 days of elapsed time once drying and cure cycles are counted.
How to Reduce 3D Printing Lead Time
Speed up your turnaround by optimizing before you hit print.
File Preparation and Design Optimization
Prepare your CAD file properly before submission. Files with errors cause reprints and delays.
Check for:
- Thin walls that might break during printing
- Unsupported overhangs requiring excessive supports
- Unnecessary complexity that adds print time
- Missing drainage holes in SLA parts (trapped resin causes problems)
Simplify geometry where possible. Remove internal features that don't affect function. Reduce wall thickness if strength allows. Every millimeter of material you eliminate reduces print time.
Orient parts to minimize support material. A smart orientation can cut print time by 25-40% compared to a poor one. At Alex 3D Print Us LLC, we review every design and suggest optimizations before printing.
Batch Printing and Parallel Production
Print multiple parts simultaneously on the same machine. If you need five prototypes, print them all in one batch rather than one at a time.
Batch printing doesn't add much time.
Parallel production means printing on multiple machines at once. Need quick turnaround? We can run your job on several printers simultaneously, then assemble or ship the best results.
Express Versus Standard Turnaround Options
Speed tiers are not just a price multiplier. Moving a job up the queue changes what is physically possible, what gets sacrificed, and how much risk you carry. Understanding the mechanics helps you pick the right tier instead of paying for speed you do not need.
What Each Tier Actually Changes
Standard runs your job in the order it was received. The printer is loaded when a machine frees up, and finishing happens in normal shop flow. This is the cheapest option because nothing is displaced.
Express moves your job ahead of standard work. The provider either holds a machine open, runs your part overnight, or pulls a printer off a lower-priority job.
Rush compresses the schedule itself.
What Rush Service Cannot Fix
Some delays are not queue problems, and no amount of money removes them.
- Cure and dry time. Resin post-curing, paint drying, and adhesive setting have physical minimums. A painted part cannot ship the same hour it is sprayed.
- Print physics. A 30-hour print does not become a 6-hour print because you paid for rush. The only ways to shorten it are a coarser layer height, a different technology, or splitting the part.
- Material availability. If the resin or filament is not on the shelf, the clock does not start until it arrives.
- Inspection and reprint risk. Skipping inspection to save time is how you end up with a reprint that costs more than the rush fee.
The Trade-offs You Are Actually Accepting
| What you gain | What you give up |
|---|---|
| Faster queue position | Higher cost per part |
| Overnight or weekend runs | Choice of material or color |
| Single-part priority | Build-plate efficiency (fewer parts per run) |
| Faster layer height | Surface finish and fine detail |
| Split production across printers | Consistency between copies |
A common pattern is that rush service is feasible for small, simple parts in standard materials and much harder for large parts, engineering resins, or anything requiring paint and assembly.
How to Decide Which Tier You Need
Work backward from your deadline instead of forward from today.
- Write down the date and time you need the part in hand. Not shipped, in hand.
- Subtract shipping. Ground transit is typically 1-5 business days depending on distance; expedited shipping is 1-2 business days at a higher cost.
- Subtract finishing. Use the post-processing estimates above for your finish level.
- Subtract print time. Use the technology and part size to estimate the print window.
- Subtract one buffer day. This absorbs a failed print, a reprint, or a shipping delay.
If the remaining number of days is negative, you need express or rush. If it is comfortable, standard service will save you money.
Cheaper Ways to Buy Speed
Before paying a rush premium, try these:
- Simplify the finish. As-printed with support removal is dramatically faster than painted and smoothed.
- Split the part. Printing two halves on two machines can beat printing one large piece on one machine.
- Switch technology. For small, detailed parts, SLA often beats FDM on total time even though the per-layer speed is slower, because there are fewer finishing steps.
- Batch your iterations. If you expect to revise the design, order two or three versions in one run instead of one version at a time.
- Submit print-ready files. Missing drainage holes, non-manifold geometry, or wrong units cause a file review round-trip that can cost a full day before anything prints.
At Alex 3D Print Us LLC, we quote standard, express, and rush options side by side so you can see the cost of each day you save. Upload your STL file for an instant quote that shows your options.
Frequently Asked Questions
How long does it take to get a prototype from a 3D printing service?
End-to-end delivery typically ranges from 5 to 15 business days, depending on complexity, material, and service level. Actual print time varies by technology and part size, but file preparation, print queue, post-processing, and shipping add to the total lead time. Express services can reduce this to 2-5 business days, though at higher cost. Contact Alex 3D Print Us LLC for a quote on your specific project timeline.
What factors affect 3D printing time the most?
Part size, geometry, layer height, material, and printer availability are the primary drivers. Larger parts, complex geometries, finer resolutions, and specialty materials all extend print duration. Additionally, printer queue time and post-processing requirements (support removal, surface finishing, curing) significantly impact total turnaround. Optimizing your CAD file and design before submission can reduce lead time substantially.
How can I reduce the lead time for a 3D printed prototype?
Submit a clean, optimized CAD file to minimize setup delays. Choose standard materials and layer heights when possible. Request batch printing if you need multiple iterations, as parallel production can accelerate overall delivery. For urgent deadlines, express services prioritize your job in the print queue. Discuss your timeline with your service provider early, they can recommend design adjustments that cut lead time without compromising function.
How long does post-processing add to 3D printing turnaround time?
Post-processing typically adds 2-7 business days, depending on requirements. Support removal, surface finishing, and painting or dyeing take time. If your prototype needs assembly, inspection, or custom engraving (like laser etching for branding), add another 1-3 business days. Simple prints with minimal finishing may skip post-processing entirely. Clarify post-processing scope upfront to get an accurate total turnaround estimate.